Right now it’s imperative that everyone is wearing face masks when going outside. Wearing a mask stops your germs from spreading if you have the virus, and they stop you from touching your face if your hands have come into contact with infected surfaces. You can start spreading COVID-19 before showing any symptoms, so the smartest thing to do is to be cautious and protect those around you.
You don’t have to know how to sew to make a face mask. Most likely, you have the materials lying around to make at least one of these types of masks. You can make these for yourself, or make them in large batches to donate to people in need. If you’d like to learn how to make a face mask and where/how to donate them, look no further.
PLEASE NOTE: If you are working in the medical field, you should be wearing a medical-grade PPE mask if they are available. The masks listed below are homemade alternatives that are recommended as a last resort, and should not replace a protective mask needed when working with infected patients. These masks can help prevent the spread of germs and stop you from touching your face, but are not guaranteed to stop you from getting coronavirus.
T-Shirt Mask
You will need:
- Clean cotton t-shirt
- Scissors
Here’s how you make it:
1. Cut out two rectangles, or, if you have enough fabric, one large rectangle you can fold in half to make it more secure. I just cut off the entire bottom of a t-shirt, but this should be roughly between 16-25 inches, depending on how long you’d like the straps.
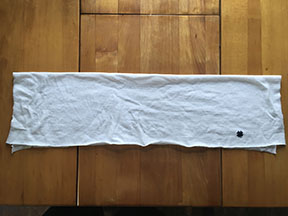
2. Cut a rectangle out of each short edge, cutting about a third of the fabric (6-7 inches) to make your straps. Start small, you can adjust this by cutting more. But, you can’t bring back what you cut!
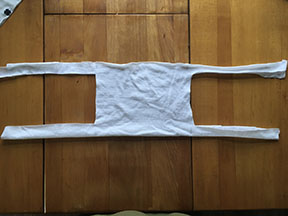
3. Pull on the straps to secure them and make them act more like string.
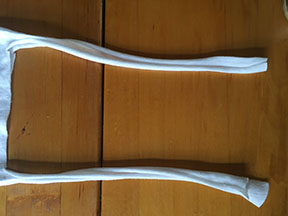
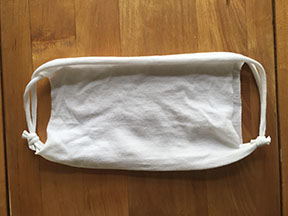
4. Tie your straps together as loose or as tight as needed. If you tie the knot toward the bottom of the mask, it won’t get in the way of your ears. You can also keep the strings long and tie them around your whole head instead of your ears. You can put a coffee filter in between the mask layers at this step if you’d like.
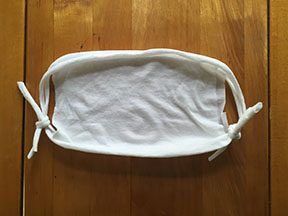
5. Trim the excess material if you’d like, and you’re done!
Bandana Mask
You will need:
- Clean Bandana
- Hair ties or rubber bands
Here’s how you make it:
1. Lay the bandana flat, right side down.
2. Fold the top and bottom edges to the middle of the bandana.
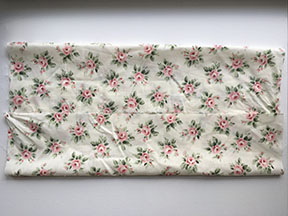
3. Fold the top and bottom to the middle a second time. Before folding, you could put a coffee filter in the center if you’d like, and fold over it.

4. Place your hair ties/rubber bands around the bandana, a little more than 1/3 from the center.
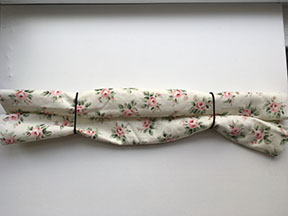
5. From the right and left side, fold the bandana toward the center at the hair ties/rubber bands.
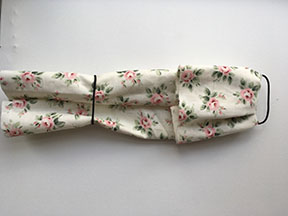
6. Tug on the hair ties/rubber bands to secure, and you’re done!
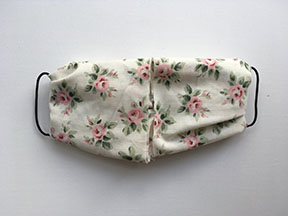
Sewn Mask
You will need:
- 2 pieces of tight-weave cotton fabric (9″ x 6” each)
- 2 pieces of elastic (7″ each)sewing machine
Here’s how you make it:
1. Lay out your two pieces of fabric, with the right/patterned sides facing away from each other (the bottom one toward the table and the top one toward you)
2. Starting from the center of one of the long edges, sew along the fabric to the corner, and place an elastic at the corner to be sewn.
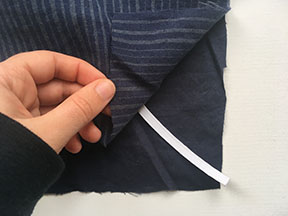
3. Sew to the next corner, and bring the other end of the same elastic to that corner. The elastics should be connected at the short sides, as shown below. This step will be done in between the two pieces of fabric. Sew across the bottom, leaving about 2″ open.
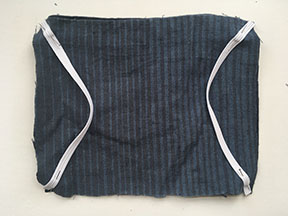
4. Flip the mask inside out, and tug on the elastics so they are fully out.
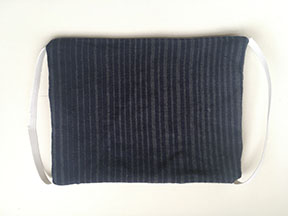
5. Pin three pleats along both short edges of the mask. If you pin the pleats a half-inch lower than the edge, you can sew right along the top without stopping to take them out.
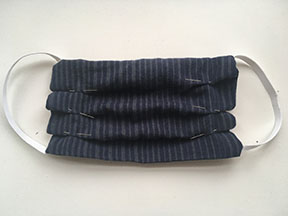
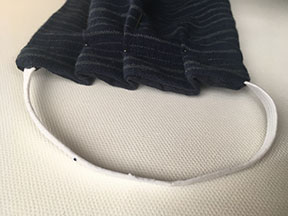
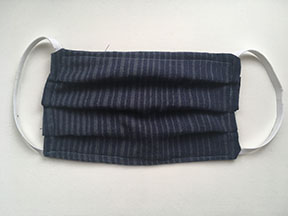
6. Sew along all the edges of the mask, locking in those pleats and filling the space from earlier. And you’re done!
Masks Donation
If you can sew, these types of masks are best to donate to people who need them. You can find places near you that are accepting face masks at the Deaconess (www.deaconess.com/How-to-make-a-Face-Mask/Mask-Donations).
Other options are:
- All open JOANN fabric stores (www.joann.com/make-to-give-response) are also accepting masks for drop-off.
- Check out #millionmaskchallenge on Twitter to see where other people are sending their masks!
If you do plan on making face masks to donate, be sure to wash your hands and clean your workspace before you start, and wear a mask while you work. You should wash the material to be used, and wash and iron it when you’re done so they look cleaner, and as an extra safety precaution. Stay safe and make those masks!
ABOUT UNITED PLANET
United Planet is a non-profit organization with a mission to create a global community, one relationship at a time. Established in 2001, United Planet offers volunteer abroad, virtual internships, internships abroad, gap year volunteering, and global virtual exchange in more than 40 countries.
